本文共 5589 字,大约阅读时间需要 18 分钟。
有关套接子和http请求报文的博客在CSDN有很多,这里我就不再做过多赘述了,下面我们直接实战,模拟http请求。
要求:浏览器访问本地的localhost,在浏览器页面打印出 Hello World
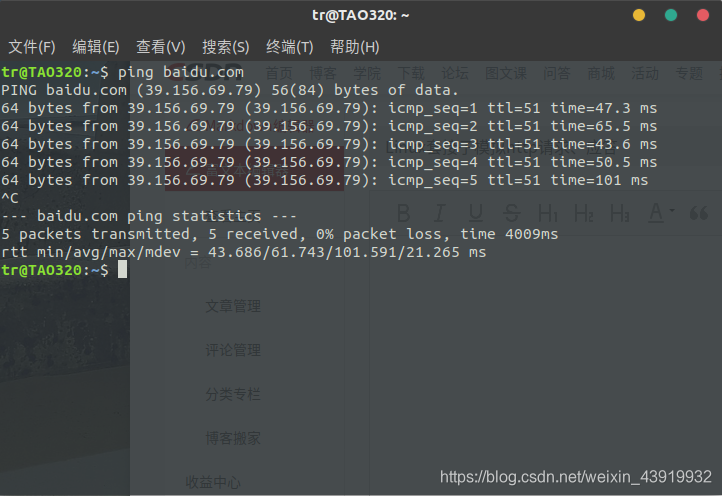
首先:ping 一下百度的网址得到一个百度的ip,我们可以利用这个ip来查看http应答报头

39.156.69.79这是我们得到的百度的ip,事实上我下面用到的代码是另一个ip(220.181.112.244 是 baidu.com 另一个 ip 地址)。代码呈上
#include#include #include #include #include #include #include int main(){ int sockfd; int len; struct sockaddr_in address; int result; char *strings="GET / HTTP/1.1\r\nHost: 220.181.112.244\r\nConnection: Close\r\n\r\n"; char ch; sockfd = socket(AF_INET, SOCK_STREAM, 0); address.sin_family = AF_INET; address.sin_addr.s_addr = inet_addr("220.181.112.244"); address.sin_port = htons(80); len = sizeof(address); result = connect(sockfd, (struct sockaddr *)&address, len); if(result == -1){ perror("oops: client1"); return 1; } write(sockfd,strings,strlen(strings)); while(read(sockfd,&ch, 1)){ printf("%c", ch); } close(sockfd); return 0;}
通过上面这段代码我们可以得到百度的http应答格式,以便于我们模仿这种格式写出我们自己的服务端代码。浏览器返回的信息如下所示:
HTTP/1.1 200 OK
Accept-Ranges: bytes Cache-Control: no-cache Content-Length: 14615 Content-Type: text/html Date: Thu, 24 Oct 2019 18:06:08 GMT P3p: CP=" OTI DSP COR IVA OUR IND COM " P3p: CP=" OTI DSP COR IVA OUR IND COM " Pragma: no-cache Server: BWS/1.1 Set-Cookie: BAIDUID=0F88738275DFC145AFA84697D48B8087:FG=1; expires=Thu, 31-Dec-37 23:55:55 GMT; max-age=2147483647; path=/; domain=.baidu.com Set-Cookie: BIDUPSID=0F88738275DFC145AFA84697D48B8087; expires=Thu, 31-Dec-37 23:55:55 GMT; max-age=2147483647; path=/; domain=.baidu.com Set-Cookie: PSTM=1571940368; expires=Thu, 31-Dec-37 23:55:55 GMT; max-age=2147483647; path=/; domain=.baidu.com Set-Cookie: BAIDUID=0F88738275DFC1456A9A4114F710FF71:FG=1; max-age=31536000; expires=Fri, 23-Oct-20 18:06:08 GMT; domain=.baidu.com; path=/; version=1; comment=bd Traceid: 1571940368268139802612049320315244439823 Vary: Accept-Encoding X-Ua-Compatible: IE=Edge,chrome=1 Connection: close<!DOCTYPE html><!--STATUS OK-->
<html> <head>…… 这里省略一大堆内容 ……
</body></html>
以上我们可以得到:
- HTTP/1.1 200 OK //1.1表示http协议版本 200为状态码 OK为状态描述
- Accept-Ranges: bytes //标识自身支持范围请求
- Cache-Control: no-cache //指定请求和响应遵循的缓存机制
- Content-Length: 14615 //要发送的内容长度
- Connection: close //短连接,表示服务器给客户端发送信息之后就断开了
其次:是服务器端的代码,这里我使用了多线程,以便实现多个客户端(页面)同时访问
#include#include #include #include #include #include #include #include #include //套接子通讯服务端,全双工//多线程void thread_fun(void* arg){ int c = (int)arg; //保存http应答头部信息 char Http[2048] = "HTTP/1.1 200 OK\r\nAccept-Ranges: bytes\r\n\ Content-Length: 13\r\nConnection: close\r\n\\r\n"; //客户端要接收的内容,与头部中的Content-Length对应 char buff[128] = "hello world!";//发送的数据 strcpy(Http, buff); char tmp[1024] = {0};//接受客户端请求 int n = recv(c,tmp,1023,0); printf("%s\n",tmp);//打印客户端请求 send(c,Http,strlen(Http),0);//向客户端应答 close(c);//每个客户端只接收一次就关闭 printf("client close\n"); }int main(){ int sockfd = socket(AF_INET, SOCK_STREAM, 0);//文件标识符 assert( sockfd != -1); struct sockaddr_in saddr,caddr;//ipv4地址结构 memset(&saddr, 0 , sizeof(saddr)); saddr.sin_family = AF_INET;//地址族 saddr.sin_port = htons(80);//大端,网络字节序列 saddr.sin_addr.s_addr = inet_addr("127.0.0.1");//自己主机ip int res = bind(sockfd, (struct sockaddr*)&saddr, sizeof(saddr));/*绑定监听的ip地址和端口*//*端口或ip错误会导致绑定失败*/ assert( res != -1); listen(sockfd, 5);//创建监听队列,开始监听,不会阻塞 //循环执行多次响应 注:如果不使用多线程或多进程的方式处理,只能同时响应一个客户端,其他客户端在监听队列排队,直到上一个客户端关闭,这里使用了多线程 while(1) { int len = sizeof(caddr); int c = accept(sockfd, (struct sockaddr*)&caddr, &len);//c为监听套接子 if( c < 0) { continue;//如果接收失败,重新接收 } //printf("accept c = %d\n",c);//打印文件描述符,表示这是第几个客户端,其中0、1、2号不可用,为标准输入、输出、错误输出,3号为sockfd,因此客户端从4开始 printf("accept(ip:%s,port:%d) c = %d\n",inet_ntoa(caddr.sin_addr),ntohs(caddr.sin_port),c); //多线程 pthread_t id; pthread_create(&id,NULL,thread_fun,(void*)c);//这里没有传递c的地址,防止c多次使用时值被改变 }}
至此,服务端就完成了,由于我们使用了80号端口,所以运行时请用管理员权限。另外,服务端关闭后服务端的状态不会马上成为CLOSED状态,此时服务端处于TIME_WAIT状态,两分钟左右后才会完全关闭,服务端才能再次运行,具体原理请查资料TCP状态转移图 。用到的命令主要有以下几个:
编译: $gcc -o ser_http ser_http.c -pthread
运行: $sudo ./ser_http
$netstat -natp 此命令可查看使用TCP网络资源的进程
最后:我们根据服务端接受的来自网页的请求报文,还可以自己写一个客户端的代码
步骤:运行服务端,浏览器输入 localhost 回车,在服务端上已经打印出了来自浏览器的请求报文,如下所示:
accept(ip:127.0.0.1,port:37022) c = 4
GET / HTTP/1.1 Host: localhost User-Agent: Mozilla/5.0 (X11; Ubuntu; Linux x86_64; rv:69.0) Gecko/20100101 Firefox/69.0 Accept: image/webp,*/* Accept-Language: zh-CN,zh;q=0.8,zh-TW;q=0.7,zh-HK;q=0.5,en-US;q=0.3,en;q=0.2 Accept-Encoding: gzip, deflate Connection: keep-alive
以上我们可以得到:
- GET / HTTP/1.1 //用GET方式请求,http协议,版本1.1
- Host: localhost //本地主机
- User-Agent: Mozilla/5.0 (X11; Ubuntu; Linux x86_64; rv:69.0) Gecko/20100101 Firefox/69.0 //用户代理:操作系统、浏览器等的信息
- Connection: keep-alive //长链接
根据以上信息模拟客户端的http请求,代码如下:
#include#include #include #include #include #include #include #include int main(){ int sockfd = socket(AF_INET,SOCK_STREAM, 0); assert( sockfd != -1); struct sockaddr_in saddr; memset(&saddr, 0 , sizeof(saddr)); saddr.sin_family = AF_INET; saddr.sin_port = htons(80); saddr.sin_addr.s_addr = inet_addr("127.0.0.1"); int res = connect(sockfd, (struct sockaddr*)&saddr, sizeof(saddr)); assert( res != -1); //模拟http请求报头 char str[1024] = "GET / HTTP/1.1\r\nHost: 127.0.0.1\r\nConnection: Close\r\n\r\n"; send(sockfd, str, strlen(str), 0);//发送请求 memset(str, 0, 1024); recv(sockfd,str,1023,0);//接受 printf("%s\n",str); close(sockfd);}
以上只实现了固定格式的http的应答方式,也就是说不管客户端发送的请求内容是什么,我们服务端都回复相同的信息,但真实的服务器是会根据请求内容的不同向客户端发送不同的内容,因此我们可以重新设计服务端实现动态的根据客户端的请求内容进行相应的响应应答。
转载地址:http://hoio.baihongyu.com/